How to Screen Record on iPhone: Complete Guide for iOS Users
 Dylan Hughes
 Screen recording on iPhone has become an essential feature for millions of users worldwide. Whether you're creating a tutorial, capturing a gaming session, documenting a bug for tech support, or saving a video call moment, knowing how to record your iPhone screen opens up countless possibilities. Apple introduced native screen recording to iOS in 2017, and it's been refined ever since.
The built-in screen recorder works seamlessly across all iPhone models running iOS 11 or later. You can capture everything happening on your display with just a few taps, including audio from your device or microphone. But many users don't realize this feature exists or know where to find it. Let's explore everything you need to know about recording your iPhone screen like a professional.
Setting Up Screen Recording on Your iPhone
Before you can start recording, you need to add the screen recording button to your Control Center. This takes about thirty seconds. Open the Settings app and navigate to Control Center. Scroll down until you see "Screen Recording" in the list of available controls. Tap the green plus icon next to it.
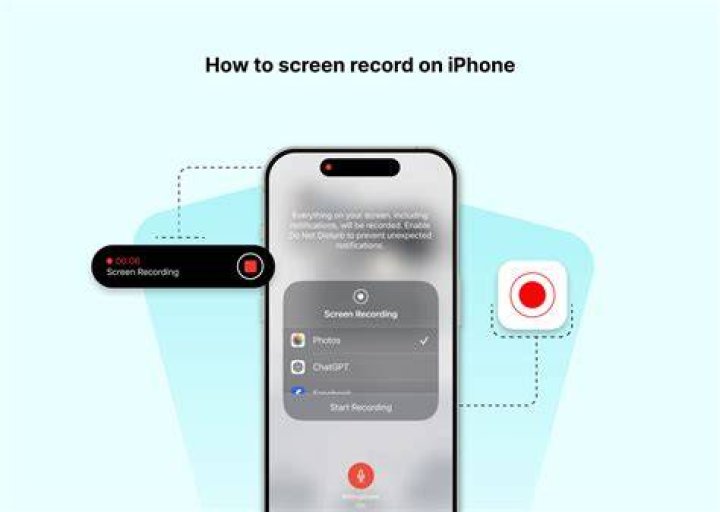
Now swipe down from the top-right corner on iPhone X or later (or swipe up from the bottom on iPhone 8 or earlier) to access Control Center. You'll see a circular recording button that looks like a solid dot inside a ring. That's your screen recorder, ready to go whenever you need it.
The placement in Control Center is customizable. If you want screen recording more accessible, go back to Control Center settings and drag it higher in the list. The order in settings determines where controls appear on your screen.
How to Record Your iPhone Screen Step by Step
Recording is straightforward once you've added the control. Open Control Center and tap the screen recording button once. You'll see a three-second countdown timer. This gives you time to navigate to whatever you want to record before capture begins.
A red indicator appears at the top of your screen while recording is active. On older iPhones with a notch, you'll see a red bar. On newer models, the time display turns red. Everything you do from this point forward gets captured—app switching, notifications, typing, scrolling, all of it.
To stop recording, either tap the red indicator at the top and confirm you want to stop, or return to Control Center and tap the recording button again. The video saves automatically to your Photos app. You'll receive a notification when the recording finishes processing.
Recording with Audio from Your Microphone
By default, screen recordings capture system sounds but not your voice. If you want to add narration or commentary, long-press (or 3D Touch on compatible devices) the screen recording button in Control Center. A menu pops up with a microphone icon at the bottom.
Tap the microphone to toggle it on—it should turn red when active. Now when you start recording, your iPhone will capture both what's happening on screen and anything you say through the built-in microphone. This works perfectly for tutorials, walkthroughs, or explaining something technical to someone.
Keep in mind that the microphone picks up ambient noise too. Record in a quiet environment for the best results. Some apps may limit audio recording due to copyright protection, particularly streaming services. You'll still capture the video, but the audio might be muted or blocked.
Key Features and Limitations You Should Know
The native iPhone screen recorder is powerful but has some boundaries worth understanding before you start a big project.
- Video quality matches your screen resolution—recordings on newer iPhones with higher-resolution displays will produce larger, sharper files
- There's no built-in time limit, but extremely long recordings consume significant storage space
- You cannot selectively record just one app while keeping others private—everything visible gets captured
- Some apps block screen recording entirely due to DRM or privacy policies, especially banking and streaming apps
- The recording pauses automatically if you receive a phone call, then resumes when the call ends
- Face ID authentication screens won't be captured for security reasons
- Battery drain accelerates during recording, especially with microphone audio enabled
Editing Your Screen Recordings
Once you've captured your screen, you can edit the recording directly in the Photos app. Open the video and tap "Edit" in the top-right corner. The editing interface lets you trim the beginning and end by dragging yellow handles along the timeline.
You can also adjust exposure, contrast, and color settings using the editing tools. If you need more advanced editing—adding text overlays, cutting middle sections, or combining multiple clips—you'll need a third-party app like iMovie, which comes free with iOS devices.
iMovie allows frame-by-frame precision, transitions between clips, text titles, and background music. For professional content creators, apps like LumaFusion offer even more control, though they come with a steeper learning curve and price tag.
Third-Party Screen Recording Apps
While Apple's built-in recorder handles most situations beautifully, specialized apps offer additional features. Record it! provides tools for adding video reactions through your front-facing camera while recording. You can show your face in a bubble overlay, popular for gaming content and reaction videos.
TechSmith Capture connects directly to Camtasia for desktop editing. DU Recorder includes live streaming capabilities and built-in video editing. Go Record offers higher frame rates for smoother playback, beneficial for fast-paced content like mobile games.
However, these apps typically require iOS permissions that go beyond what the native recorder needs. Read privacy policies carefully. Many free apps include watermarks on exported videos or limit recording duration unless you purchase premium versions.
Troubleshooting Common Screen Recording Problems
Sometimes screen recording doesn't work as expected. If the button appears grayed out, check if you're using an app with recording restrictions. Banking apps, streaming services, and apps handling sensitive information often block capture.
If recordings don't save to Photos, verify you have sufficient storage space. Screen recordings consume substantial space—a five-minute video at typical resolution can easily exceed 500MB. Check available storage in Settings under General, then iPhone Storage.
Audio issues usually stem from the microphone toggle. If you're not hearing system sounds in playback, the volume may have been muted during recording. If you expected microphone audio but don't hear your voice, you forgot to enable the mic before starting.
Choppy or laggy recordings indicate your iPhone is struggling with resource demands. Close background apps before recording. Older iPhone models may struggle with smooth capture while running graphics-intensive apps simultaneously.
Best Practices for Quality Screen Recordings
Clean up your home screen before recording if it'll be visible. Temporary notifications can interrupt your capture and look unprofessional. Enable Do Not Disturb mode to prevent notifications entirely—swipe down from the top-right and tap the crescent moon icon.
Plan what you're recording in advance. Script tutorials or walkthroughs mentally before hitting record. This reduces mistakes and keeps recordings concise. Viewers appreciate tight, focused content over rambling fifteen-minute videos that could've been three.
Charge your battery or connect to power for long recordings. Screen capture drains power quickly, and you don't want your iPhone dying mid-session. For professional work, consider external power banks or direct charging.
Test audio levels before important recordings. Record a quick ten-second test, play it back, and verify both system sounds and microphone audio (if enabled) are audible and balanced.
Privacy and Legal Considerations
Recording your own iPhone screen is perfectly legal, but recording content you don't own raises copyright questions. Capturing Netflix shows, YouTube videos, or copyrighted material for redistribution violates terms of service and potentially copyright law.
If recording conversations or video calls, inform other participants. Laws about recording conversations vary by location. Some regions require all parties to consent; others need just one-party consent. When in doubt, ask permission first.
Be cautious about capturing sensitive information. Screen recordings may inadvertently show passwords, credit card numbers, or private messages. Review recordings before sharing them publicly or with others.
Frequently Asked Questions
Can I record FaceTime calls with screen recording?
Technically yes, but both parties should consent to being recorded. Most jurisdictions require notification when recording conversations. FaceTime also has built-in protections—the other person may receive a notification that recording is active. Respecting privacy is more important than getting footage.
Why isn't screen recording working on certain apps?
Apps handling sensitive content often block screen recording at the software level. Banking apps protect financial information, streaming services protect copyrighted content, and messaging apps may protect privacy. This is intentional security, not a bug. You'll see a black screen or error message when attempting to record these apps.
How much storage space do screen recordings use?
It depends on recording length and screen resolution. As a rough estimate, expect 100-150MB per minute on newer iPhones with high-resolution displays. A ten-minute tutorial could easily consume 1.5GB. Monitor your storage and transfer recordings to a computer or cloud storage regularly if you record frequently.
Final Thoughts
Screen recording on iPhone has evolved from a niche feature into an everyday tool for millions. The native functionality handles most needs beautifully without requiring third-party apps or complicated setups. Whether you're troubleshooting technical issues, creating content, or just capturing something interesting on your screen, the built-in recorder delivers.
Master the basics—adding the control, starting and stopping recordings, enabling microphone audio—and you're already ahead of most users. As you get comfortable, explore editing tools and advanced techniques. The best screen recordings combine good planning, clean execution, and thoughtful editing. Your iPhone already has everything you need to create professional-looking screen captures. Start experimenting today.