How to Put in Hair Tinsel: Complete Guide for Sparkling Strands
 William Smith
Hair tinsel has become one of the most popular ways to add instant sparkle and dimension to any hairstyle without permanent commitment. These shimmering strands catch light beautifully, creating an eye-catching effect that works for casual outings, special events, or festival season. The best part? You can install them yourself at home with minimal supplies and a bit of practice.
Unlike traditional hair dye or extensions, tinsel strands are temporary, heat-resistant, and surprisingly durable when applied correctly. They blend seamlessly with natural hair, working across all colors and textures. Whether you want subtle sparkle or bold, colorful shimmer, learning the proper installation technique ensures your tinsel stays secure for weeks.
What You Need to Get Started
The supplies for adding hair tinsel are straightforward and inexpensive. Most importantly, you need the tinsel itself—thin, metallic strands specifically designed for hair. These come in various colors, from silver and gold to rainbow hues and holographic finishes. Real hair tinsel differs from craft tinsel because it's made from heat-resistant polyester that can withstand styling tools up to 300°F.
You'll also need a small crochet hook or specialized threading tool. Many tinsel kits include a micro hook, but a standard 0.5mm or 0.75mm crochet hook works perfectly. A rattail comb helps section hair cleanly, and small hair clips keep sections organized during application. Some people prefer using a slip knot method, while others use micro beads or heat fusion, but the loop technique remains the most popular for at-home application.
Preparing Your Hair for Tinsel Application
Start with clean, dry hair. Freshly washed hair can be slippery, so day-old hair actually provides better grip. Brush thoroughly to remove any tangles—working with smooth hair prevents the tinsel from catching or knotting during installation.
Decide on your placement strategy before you begin. Most people prefer tinsel near the face for maximum visibility, but you can place strands throughout your hair for all-over shimmer. The underneath layers near your nape create a peek-a-boo effect, while tinsel concentrated around the crown catches light from above. There's no wrong approach, but having a plan prevents random, scattered placement that might look unintentional.
Section off the area where you want to add tinsel. Smaller sections make the process more manageable, especially for beginners. If you're working on someone else, have them sit comfortably with their head at your working height.
The Step-by-Step Installation Process
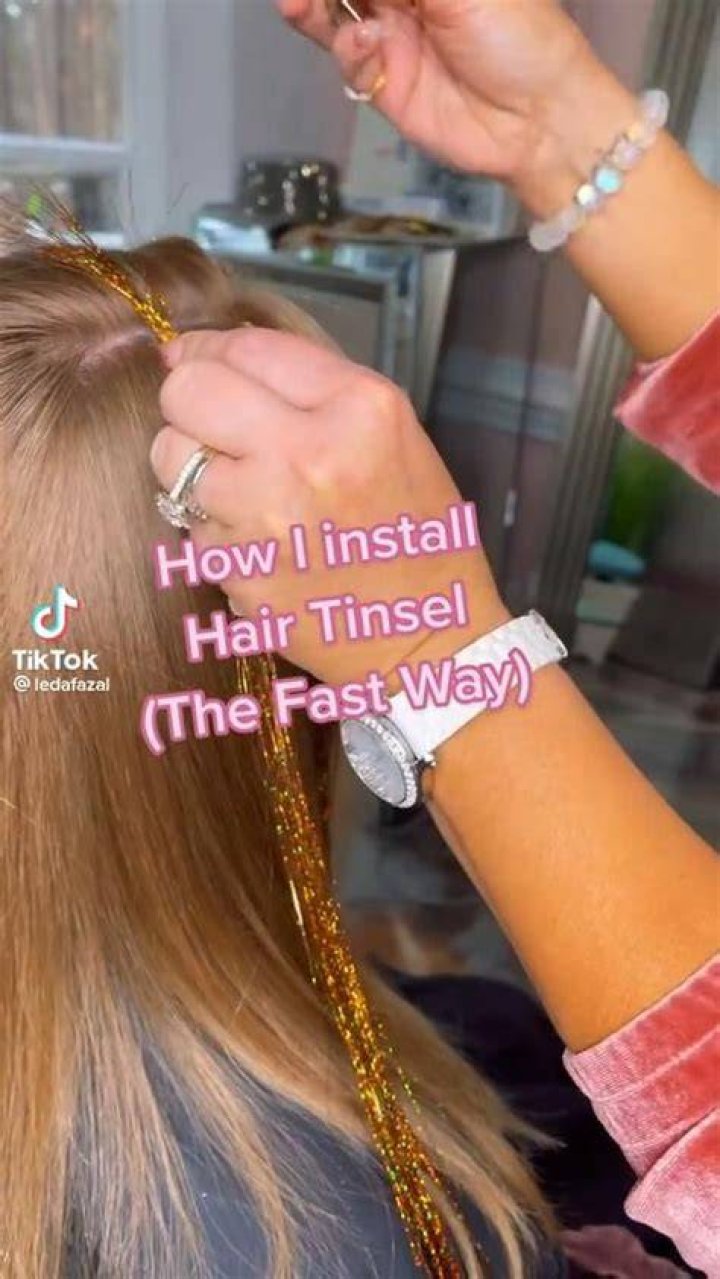
Select a small section of hair—about 5 to 10 strands thick. The thinner your hair section, the more secure your tinsel will be. Hold this section taut between your fingers, keeping it separated from surrounding hair.
Take one strand of tinsel and fold it in half, creating a loop at the top. Thread your crochet hook through the small section of hair from underneath, starting close to the scalp but leaving about a quarter-inch gap. This space prevents scalp irritation and allows for natural hair movement.
Hook the folded loop of tinsel with your crochet tool, then pull it back through the hair section. You should now have a loop on one side and two loose ends on the other. Thread those two loose ends through the loop you created.
Pull gently but firmly to tighten the knot. The tinsel should cinch snugly around your natural hair without pulling uncomfortably. Give it a gentle tug to test security—it should hold without sliding. If it feels loose, you may have selected too much hair or not tightened the knot sufficiently.
Repeat this process throughout your desired sections. Spacing matters: placing tinsel strands about one to two inches apart creates balanced sparkle without overwhelming your natural hair. You can always add more later, but removing excess tinsel means cutting it out.
Alternative Installation Methods
The slip knot technique described above works for most people, but other methods exist. Micro beads offer extreme security and work well for active lifestyles or those who swim frequently. This method requires threading tinsel and hair through a tiny bead, then clamping it flat with pliers. The result lasts longer but requires pliers for removal.
Heat fusion connects tinsel using a specialized tool that melts a keratin bond around your hair. Salons typically offer this method, which provides the longest-lasting results but costs more and requires professional removal. It's overkill for temporary sparkle but ideal if you want tinsel for months.
Some people simply braid tinsel into their hair without any attachment method. This works for a day or two but won't survive sleeping or vigorous activity. It's perfect for photoshoots, performances, or single-event wear.
How Long Hair Tinsel Lasts
Properly installed tinsel typically lasts two to six weeks, depending on your hair care routine and lifestyle. The strands themselves are durable—it's the knot attachment that eventually loosens as your hair grows and sheds naturally. Each time you lose a hair strand that has tinsel attached, that tinsel piece falls out too.
Active individuals who exercise daily, swim regularly, or style their hair frequently might see tinsel last on the shorter end of that range. People with gentler hair routines often enjoy sparkle for over a month. The tinsel itself rarely breaks or dulls during normal wear.
You can refresh your look by adding new strands as old ones fall out. Many people maintain a rotating collection of tinsel, replacing pieces every few weeks to keep the sparkle consistent.
Caring for Your Tinsel Extensions
Treat your tinsel like your natural hair. You can wash, condition, blow-dry, and heat style as usual. The polyester strands resist heat up to 300°F, meaning straighteners and curling irons won't damage them when used at normal temperatures. However, avoid excessive heat directly on the knot attachment point.
Brush gently, starting from the ends and working upward. The tinsel may tangle with natural hair if you brush too aggressively from the roots. A wide-tooth comb or soft bristle brush works best.
When swimming, consider wearing a swim cap or tying your hair up. Chlorine and salt water won't damage the tinsel, but the constant movement and friction can loosen the knots faster. If you swim frequently, the micro bead method provides better security than slip knots.
Sleep with your hair in a loose braid or silk bonnet. This protects both your natural hair and tinsel from friction against your pillowcase, which can cause tangling and premature shedding.
Troubleshooting Common Issues
Tinsel sliding down happens when the knot wasn't tight enough or too much hair was included in the section. If you catch it early, you can sometimes re-tighten by pulling the loose ends, but usually you'll need to remove and reapply that strand.
Tangling occurs most often when tinsel gets wound around natural hair during brushing. Gently separate the tangled strand, working slowly to avoid pulling out your natural hair. Prevention works better than cure—brush carefully and regularly.
If tinsel looks too sparse after application, simply add more strands. There's no maximum limit, though most people find 10 to 30 strands creates noticeable sparkle without looking costume-like. Adjust based on your hair density and personal preference.
Scalp irritation is rare but can happen if tinsel is attached too close to the roots. Leave that quarter-inch buffer zone, and if irritation develops, remove the offending strand immediately. Some people have sensitivity to certain tinsel materials—stick with high-quality, hair-specific tinsel rather than craft store alternatives.
Choosing Colors and Creating Looks
Silver and gold remain the most popular choices because they complement virtually every hair color. Silver creates an icy, edgy vibe and shows up dramatically against dark hair. Gold adds warmth and blends beautifully with blonde, brunette, and red tones.
Color tinsel opens up creative possibilities. Purple and blue work stunning against blonde and silver hair. Pink and red create bold statements in dark hair. Rainbow or holographic tinsel shifts colors in different lighting, offering a magical, iridescent effect.
You can mix multiple colors for a custom look. Try combining silver with one bold accent color, or blend three complementary shades for dimension. Color theory applies here—choose shades that enhance your natural hair color or intentionally contrast for drama.
The number of strands affects the overall impression. Five to ten pieces create subtle sparkle that catches light when you move. Twenty to forty strands make a clear statement without overwhelming your natural color. More than fifty transforms your look into something bold and festival-ready.
Removing Hair Tinsel Safely
When you're ready to remove your tinsel, the process is simple. Locate the knot at the base of the strand near your scalp. Using small scissors or your fingers, gently untie or cut the knot. If you cut it, snip as close to the knot as possible, leaving minimal tinsel behind.
Pull the tinsel out slowly. It should slide free easily. If you encounter resistance, you may have tangled tinsel—work carefully to avoid pulling out natural hair unnecessarily.
For micro bead installations, use pliers to gently crack open the bead, then slide it off. Never try to pull beaded tinsel out without opening the bead first—you'll lose hair in the process.
After removal, wash your hair thoroughly. You might notice a few pieces of tinsel that broke off during wear—these will wash out over the next few shampoos.
Frequently Asked Questions
Can I put hair tinsel in myself or do I need help?
You can definitely install hair tinsel yourself, though having a friend help with the back sections makes the process easier. The technique requires basic dexterity and patience but isn't complicated. Most people successfully add tinsel to their front and side sections solo. A handheld mirror helps you see the back of your head if you're working alone. Your first attempt might take 30 to 45 minutes, but with practice, you can add tinsel in 10 to 15 minutes.
Will hair tinsel damage my natural hair?
No, properly installed hair tinsel doesn't damage natural hair. The lightweight strands don't pull or stress your hair follicles like heavy extensions might. The slip knot method is especially gentle because it doesn't use heat, glue, or chemicals. However, aggressive brushing or trying to forcibly remove tangled tinsel can cause breakage, so handle your hair gently. As long as you follow proper application and removal techniques, your natural hair remains healthy.
Does hair tinsel work on all hair types and textures?
Yes, hair tinsel works beautifully across all hair types, textures, and lengths. Straight, wavy, curly, and coily hair can all accommodate tinsel. Textured hair often holds tinsel even more securely than straight hair because of natural grip. Very short hair requires at least two to three inches of length for proper attachment, but beyond that minimum, any length works. The tinsel lies flat against your hair and moves naturally with your hair's texture rather than fighting against it.
Can I color or cut my hair with tinsel installed?
You can cut your hair with tinsel in place—just make sure your stylist knows it's there so they can work around it or trim the tinsel to match your new length. However, avoid coloring your hair with tinsel installed. Hair dye won't affect the polyester tinsel itself, but the chemicals can weaken the knot attachment, causing premature shedding. Remove your tinsel before coloring appointments, then reinstall fresh strands afterward for best results.
Where can I buy quality hair tinsel?
Beauty supply stores, online retailers like Amazon, and specialty hair extension shops sell hair tinsel. Look for products specifically labeled as "hair tinsel" or "fairy hair" rather than craft tinsel, which isn't heat-resistant and may irritate your scalp. Quality tinsel typically comes in kits with 100 to 200 strands and includes a threading tool. Expect to pay between $8 and $20 for a complete kit. One pack provides enough tinsel for multiple applications, making it an economical way to experiment with temporary hair sparkle.
Final Thoughts
Adding hair tinsel transforms your look with minimal effort and zero commitment. The installation process is straightforward enough for beginners while offering creative possibilities for those who want to experiment with color and placement. Unlike permanent hair modifications, tinsel lets you test sparkle and shine knowing you can remove it whenever you choose.
The key to success lies in starting with small sections of hair, tightening your knots properly, and caring for your tinsel as you would your natural hair. Whether you're preparing for a special event, adding festival flair, or simply want everyday sparkle, hair tinsel delivers impact without the permanence of dye or the expense of professional extensions. With a bit of practice, you'll develop your own technique and discover the looks that make you feel most confident.