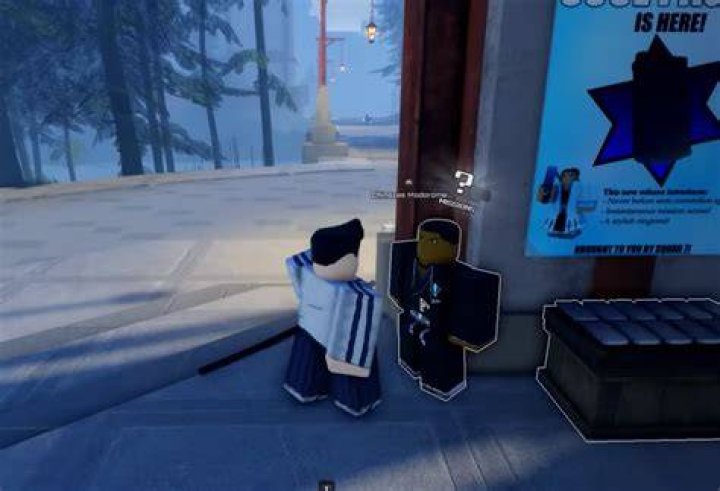
Where to Sell Items in VV Ultimatum: Complete Trading Guide
 Daniel Foster
Navigating the trading system in VV Ultimatum can make the difference between thriving and barely surviving. Knowing where to sell items efficiently transforms your gameplay experience, turning collected loot into valuable currency that funds your continued survival. Players often struggle initially with identifying optimal selling locations and understanding which merchants offer the best deals for specific item categories.
The game's economy operates on supply and demand principles, with different vendors scattered throughout the map accepting various item types. Understanding this trading network becomes essential as you progress through increasingly challenging zones and accumulate diverse inventory.
Understanding the Merchant System in VV Ultimatum
VV Ultimatum features multiple merchant types, each specializing in particular goods. The primary trading hub sits within the Safe Zone, accessible after completing the initial tutorial sequence. This central marketplace houses several vendors who purchase different item categories at varying rates.
General merchants accept common items like scrap materials, basic food supplies, and low-tier equipment. Their pricing remains consistent but modest, making them reliable for offloading standard loot. Specialist vendors pay premium rates for category-specific goods. The weaponsmith purchases firearms and ammunition at higher rates than general merchants, while the medic offers better prices for pharmaceutical supplies and medical equipment.
Location matters significantly. Remote outposts scattered across the map feature traveling merchants who occasionally offer better rates than Safe Zone vendors, though accessing them carries inherent risks. These itinerant traders appear at designated spawn points on rotating schedules, creating opportunities for savvy players willing to venture into dangerous territory.
Primary Selling Locations
The Safe Zone Market represents your most accessible selling location. Protected by NPC guards, this area allows risk-free trading at standard market rates. Four permanent merchants operate here around the clock. The general goods trader accepts virtually any item, though at baseline prices. The equipment specialist purchases weapons, armor, and tools at moderate rates. The provisions dealer focuses on consumables, offering fair compensation for food, water, and medical supplies. The crafting materials merchant buys raw resources and components used in item fabrication.
Border Outposts provide intermediate selling options. Three major outposts ring the map's periphery, each hosting two merchants. These locations offer slightly better rates than the Safe Zone—typically 10-15% higher—but require traversing moderate-threat areas to reach. Players must weigh the increased profit against ammunition expenditure and potential combat encounters during transit.
The Black Market operates from an unmarked location in the industrial sector. This clandestine vendor accepts stolen goods, rare items, and contraband that legitimate merchants refuse. Prices fluctuate wildly based on current demand, sometimes reaching 200% of standard rates for highly sought items. Finding this merchant requires exploration and often player community knowledge sharing, as the location shifts periodically to avoid detection.
Optimizing Your Selling Strategy
Inventory management directly impacts profitability. Weight limits prevent carrying excessive loot, forcing strategic decisions about what to collect and transport. High-value, low-weight items like jewelry, electronics, and rare components should take priority over bulky, low-value goods like scrap metal or common building materials.
Price comparison becomes crucial for maximizing returns. A weapon worth 500 credits at the general merchant might fetch 650 credits from the weaponsmith. That 150-credit difference adds up significantly over multiple transactions. Experienced players develop mental price lists for common items across different vendor types, enabling quick decisions about where to sell specific loot.
Bulk selling offers hidden advantages. Some merchants provide bonus credits when selling large quantities of identical items. The provisions dealer, for instance, pays a 5% premium when selling stacks of ten or more identical consumables. This incentivizes collecting multiple units of the same item rather than diverse individual pieces.
Timing influences certain transactions. Traveling merchants at Border Outposts rotate their specialty interests. One week the northern outpost merchant might pay premium rates for medical supplies, while the following week they focus on electronics. Players who track these rotation patterns can plan their selling trips to coincide with favorable rate periods.
Item Categories and Best Selling Locations
Weapons and ammunition sell best at the weaponsmith in the Safe Zone or at Border Outpost armories. Damaged weapons receive reduced rates, so repairing before selling often yields better net profit despite repair costs. High-tier weapons attract premium prices, with legendary and epic rarities commanding substantial payouts.
Crafting materials and raw resources find their highest value at the crafting materials merchant. Rare components like titanium ingots, advanced circuitry, and chemical compounds fetch excellent prices. Common materials like wood, stone, and basic metal sell for minimal amounts anywhere, making them low-priority collection targets unless you're in desperate need of quick cash.
Medical supplies generate strong returns at the medic's station. Bandages, antibiotics, stimulants, and trauma kits all command respectable prices. The medic also purchases medical equipment like defibrillators and diagnostic tools at rates 20-30% above general merchant offers.
Food and water sell adequately at the provisions dealer but rarely justify the inventory space they consume. Exception exists for specialty consumables like energy drinks, military rations, and vitamin supplements, which offer better weight-to-value ratios. Perishable items lose value over time, so selling them quickly prevents total loss from spoilage.
Contraband and stolen goods only move through the Black Market. These items—marked with red text in your inventory—cannot be sold to legitimate merchants. They typically originated from faction-controlled areas or restricted zones. Despite the risk involved in reaching the Black Market, these items often provide the highest single-transaction profits in the game.
Advanced Trading Techniques
Faction reputation influences merchant prices. As you complete missions for different factions, your standing improves, unlocking better rates at affiliated vendors. A player with high reputation with the Scavenger faction receives 10% better prices at all Scavenger-affiliated merchants. This creates strategic incentive to specialize your faction allegiances based on which items you most frequently sell.
Market manipulation remains possible for dedicated players. Buying out specific item types from merchants temporarily increases their buy-back prices when those items become scarce. This advanced technique requires significant capital investment and market knowledge but can generate substantial profits for those who master the timing.
Trade runs involve carrying high-value items between distant merchants who offer different rates. Some players specialize in these runs, purchasing items cheap at one location and selling them at premium prices elsewhere. The northern Border Outpost consistently offers lower prices on electronics, while the Black Market pays top dollar for the same items. A successful trade run can yield 40-60% profit margins, though the dangerous journey between locations adds considerable risk.
Common Selling Mistakes to Avoid
Selling everything at the general merchant represents the most common efficiency error. While convenient, this approach sacrifices significant potential profit. Taking five extra minutes to sort inventory and visit specialized vendors typically increases total revenue by 25-35%.
Ignoring item condition hurts returns. Damaged equipment sells for fractions of its full-condition value. A weapon worth 800 credits in pristine condition might fetch only 200 credits at 25% durability. Repairing items before selling often costs less than the price difference, creating net profit through that simple extra step.
Carrying low-value junk wastes precious inventory space. New players often collect everything they find, filling their limited carrying capacity with items worth 5-10 credits each. This prevents collecting truly valuable loot encountered later. Developing discernment about what deserves inventory space dramatically improves profitability per expedition.
Overlooking faction merchants costs money. Each faction maintains their own trading network with specialized goods and competitive prices. Players who only use Safe Zone merchants miss these alternatives entirely. Exploring faction headquarters and outposts reveals additional selling opportunities often offering better rates for specific item categories.
Frequently Asked Questions
Can I sell items to other players in VV Ultimatum?
Player-to-player trading exists but operates outside the standard merchant system. You can drop items for other players to pick up, but the game lacks a formal player marketplace or auction house. Most trading happens through community coordination in safe zones or via external forums where players arrange meetups. This system works for rare item exchanges but isn't practical for routine selling of common loot.
Do merchant prices change over time?
Base prices remain relatively stable for most items, but supply and demand mechanics cause fluctuations. When many players sell large quantities of specific items, merchant buy prices temporarily decrease 5-10%. Conversely, items that haven't been sold recently may see slight price increases. Traveling merchants feature more dramatic price variations, with their specialty interests rotating weekly and affecting rates by up to 30% for certain categories.
What happens to items that merchants won't buy?
Quest items, broken equipment beyond repair, and certain story-related objects cannot be sold to any merchant. These items either serve specific purposes later in gameplay or need to be dropped from your inventory to free space. The game marks unsellable items clearly in your inventory interface. Some broken items can be dismantled for crafting components rather than sold, providing alternative value extraction methods.
Maximizing Your Trading Efficiency
Smart players develop consistent routines. After each expedition, they visit specialized merchants in a specific order based on their typical loot composition. Someone who frequently engages in combat might prioritize the weaponsmith and medic, while a player focused on resource gathering heads straight to the crafting materials merchant. This systematic approach minimizes time spent navigating menus and maximizes profit per playing session.
Storage management complements selling strategy. The game allows limited stash space at the Safe Zone where you can store items between sessions. Keeping high-value items in storage until you accumulate enough to make a profitable trade run to distant merchants beats making frequent small trips. This also protects valuable loot from loss if you die during expeditions, as you only lose what you're actively carrying.
Understanding vendor refresh rates helps plan selling schedules. Merchants have limited currency pools that replenish over time. Dumping massive quantities of items on a single merchant can temporarily exhaust their available funds, forcing you to wait for the refresh or accept IOUs that pay out gradually. Spreading large sales across multiple vendors or making multiple smaller trips prevents this bottleneck.
Final Thoughts
Success in VV Ultimatum's economy requires more than knowing where merchants stand. It demands understanding which vendors pay best for specific items, timing your trades strategically, and managing inventory space efficiently. The difference between a casual seller and a skilled trader can mean thousands of credits per gaming session. Those extra funds translate directly into better equipment, more supplies, and improved survival odds in the game's challenging environments. Start by mastering the Safe Zone merchants, then gradually incorporate Border Outposts and specialized vendors as you grow more comfortable with the systems. Your bank account will reflect the effort you invest in learning these trading mechanics.