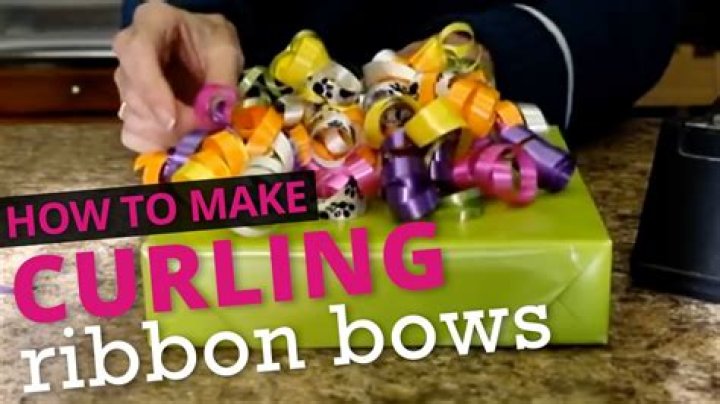
How to Make a Small Ribbon with Curling Ribbon: Complete Guide
 William Jenkins
 Curling ribbon transforms ordinary gift wrapping into something special. That glossy, spiraled material catches light beautifully and adds a professional touch to packages, party decorations, and craft projects. But knowing how to make a small ribbon with curling ribbon—one that looks intentional rather than messy—requires understanding a few fundamental techniques that separate amateur attempts from polished results.
The beauty of curling ribbon lies in its simplicity. Unlike fabric ribbons that require complex bows and loops, curling ribbon creates visual impact through texture and movement. A small ribbon arrangement can elevate a gift box, enhance a floral bouquet, or provide the finishing touch on handmade cards. The trick is controlling the curl, choosing the right length, and securing everything properly so your creation doesn't unravel before it reaches its destination.
Understanding Curling Ribbon Basics
Curling ribbon is typically made from polypropylene plastic that's been treated to hold a curl when pressure and heat are applied. You'll find it in craft stores, party supply shops, and the gift wrap section of most retailers. It comes in various widths, with narrow ribbons (around 3/16 inch) being ideal for small, delicate bows, while wider options (up to 1/2 inch) create more dramatic effects.
The material responds to tension and friction. When you pull it firmly across a sharp edge—traditionally scissors—the ribbon heats up slightly from the friction and the plastic curls. Temperature matters here. Cold ribbon curls less enthusiastically than ribbon at room temperature, which is why some crafters struggle during winter months when their supplies have been stored in chilly garages or basements.
Materials You'll Need
Gathering the right supplies before you start prevents frustration mid-project. Here's what works best:
- Curling ribbon in your chosen colors (multiple strands create fuller bows)
- Sharp scissors with smooth blades (dull scissors won't create clean curls)
- Clear tape or a glue dot for securing the center
- Wire or twist ties as alternative fasteners for certain projects
- Ruler or measuring tape if you want consistent lengths
The scissors matter more than people realize. Serrated or nicked blades will catch on the ribbon instead of providing smooth resistance. Kitchen shears often work better than small craft scissors because their longer blades give you more control over the curling motion.
Step-by-Step Instructions for Creating a Small Curling Ribbon
Start by cutting your ribbon to length. For a small ribbon arrangement, pieces between 8 and 12 inches work well. You'll need at least three to five strands to create visual fullness, though you can use more for a lusher appearance.
Gather all your cut strands and align their centers. Pinch them together tightly at the midpoint. This center point becomes your anchor. Use a small piece of clear tape wrapped around the pinched section, or thread a thin wire through and twist it tight on the back. Some crafters prefer glue dots, which hold firmly without visible hardware.
Now comes the curling. Hold one ribbon end between your thumb and the flat side of your scissors blade. Apply firm pressure—not so hard that you tear the ribbon, but enough that you feel definite resistance. Pull the scissors along the ribbon length in one smooth motion from base to tip. The ribbon should spring into a spiral. If it doesn't curl tightly, increase pressure and try again.
Repeat this process for each strand. Curl some tighter by using more pressure or making multiple passes. Leave others looser for variety. This creates dimension rather than uniform spirals that look artificial.
Fluff and arrange the curled strands by gently pulling them apart at different angles. Think of it like arranging flower petals—you want coverage in all directions without everything pointing the same way.
Common Mistakes and How to Avoid Them
The most frequent error is pulling too fast when curling. Speed tears through without transferring enough heat and friction to set the curl. Move deliberately and maintain consistent pressure throughout the motion.
Using too few strands is another pitfall. What looks adequate before curling often appears sparse once the ribbons spiral up and occupy less visual space. Always cut more pieces than you think you need. Leftover ribbon can be saved, but a skimpy bow can't be fixed without starting over.
Cutting strands at different lengths sometimes happens accidentally when you're rushing. While slight variations add character, dramatically different lengths look unbalanced. Measure carefully if symmetry matters for your project.
Forgetting to secure the center properly leads to ribbons that slide apart when handled. That tape or wire isn't decorative—it's structural. Make sure it's tight enough to grip all layers without cutting through the material.
Creative Variations and Applications
Small curling ribbon arrangements shine in contexts where full bows would overwhelm. Attach them to gift bag handles for a pop of color. Wire them into flower arrangements as filler that catches light. Stick them on greeting cards as three-dimensional embellishments.
Color combinations expand creative possibilities. Try monochromatic schemes using different shades of the same color for sophistication. Mix complementary colors for vibrant contrast. Metallic ribbons add glamour to holiday packages, while pastel bundles suit baby showers and spring celebrations.
Layering different ribbon widths creates texture. Use wider strands as your base layer and narrow ones on top. The varying curl sizes give depth that single-width arrangements lack.
Some crafters intentionally curl strands in opposite directions by flipping the scissors to the other side of the ribbon. This creates an explosion effect where curls spiral both inward and outward from the center.
Troubleshooting Curling Issues
Ribbon that won't curl despite proper technique usually indicates one of three problems. The material might be old and degraded—polypropylene loses its responsiveness over time when exposed to sunlight or heat. Your scissors could be too dull to generate the necessary friction. Or you're not applying enough pressure during the pull.
Overly tight curls that spring into kinky coils happen when pressure is excessive or the ribbon is pulled too slowly. Lighten your grip slightly and increase your speed to create looser, more graceful spirals.
Curls that fall flat after being formed suggest the ribbon wasn't fully processed during manufacturing or has been stored in humid conditions. Try running it across the scissors two or three times instead of once. The repeated friction often compensates for material deficiencies.
Storage and Preparation Tips
Store curling ribbon in a cool, dry place away from direct sunlight. The plastic degrades when exposed to UV rays, becoming brittle and less responsive. Original spools or rolls work better than loose coils, which can develop permanent kinks that resist curling properly.
Before starting a project, unroll the amount you need and let it sit for a few minutes if it's been tightly wound. This relaxes the material and prevents pre-existing curves from fighting against your intended curl direction.
If you're working with metallic or holographic curling ribbon, expect slightly different behavior. These specialty ribbons have coating layers that can flake if handled too aggressively. Use gentler pressure and make multiple passes rather than one forceful pull.
Frequently Asked Questions
Can you curl ribbon without scissors?
Yes, though scissors provide the most control. You can use the edge of a butter knife, a ruler's edge, or even your thumbnail if you have strong nails. The key is creating friction and pressure. A pencil or dowel rod pulled along the ribbon's length also works, though it produces gentler curls. Some people prefer these alternatives when working with very narrow ribbons where scissors feel unwieldy.
Why does my curling ribbon keep straightening out?
This happens when insufficient heat and friction were applied during curling, or when the ribbon material is too old. Try increasing pressure, slowing down your pull slightly, and making sure your scissors are sharp. If the problem persists, the ribbon itself may have lost its curl memory. Storing ribbon properly—away from heat and humidity—prevents this degradation. Fresh ribbon from a reputable craft supplier should hold curls reliably.
How many strands do I need for a small ribbon that looks full?
Five to eight strands typically create a balanced appearance for small arrangements. Fewer than five looks sparse unless you're intentionally going for a minimalist aesthetic. More than ten starts feeling cluttered on small gifts or tight spaces. The ribbon width also affects this calculation—narrower ribbons need higher strand counts to achieve the same visual impact as wider ones.
Can I attach curling ribbon to balloons?
Absolutely. Cut longer strands (18 to 24 inches works well), curl them, and tie the uncurled base around the balloon's knot. The weight of curled ribbon typically doesn't affect balloon float time significantly. For helium balloons, you can create small ribbon clusters and attach them to the string rather than directly to the balloon knot for easier handling. This technique adds festive flair to party decorations without much effort.
What's the difference between curling ribbon and regular ribbon?
Curling ribbon is made from polypropylene plastic specifically engineered to hold a spiral shape when friction is applied. Regular fabric ribbons (satin, grosgrain, organza) don't respond to the scissors technique and require different bow-making methods involving loops and folds. Curling ribbon is lighter, less expensive, and waterproof, making it practical for outdoor decorations. Fabric ribbons offer richer texture and more premium appearance but cost more and require different skill sets to manipulate effectively.
Final Thoughts
Making a small ribbon with curling ribbon is one of those skills that seems intimidating until you try it a few times. The first attempt might produce wonky curls or lopsided arrangements. That's expected. By the third or fourth try, muscle memory kicks in and you'll develop a feel for the right pressure, speed, and technique.
The versatility of these simple decorations justifies the small learning curve. Once you master the basic technique, you'll find yourself adding curled ribbons to gifts, crafts, and decorations almost automatically. They elevate presentation with minimal time investment and cost practically nothing compared to pre-made bows or elaborate ribbon work.
Start with inexpensive ribbon in a single color while you practice. Once you're comfortable with the mechanics, experiment with color combinations, different widths, and creative applications. The skills transfer directly—whether you're decorating a birthday present, creating party centerpieces, or adding finishing touches to handmade items, the same fundamental technique applies.
